After successfully installing WordPress, the next step is to start using it for real. Publishing your first post is often the starting point for every website. Whether you’re blogging, sharing company updates, or building a content-driven site, this step is crucial.
Next, we’ll guide you step by step through the entire process of publishing a post—from accessing the backend, to editing content and setting categories, all the way to final publication. Even if you’re new to WordPress, you can follow the steps below to successfully publish your very first post.
Before You Start
Before uploading a blog post, make sure:
- WordPress is already installed on your website
- You can log in to the WordPress admin dashboard(https://yourdomain/wp-admin)
- A WordPress theme is installed and activated
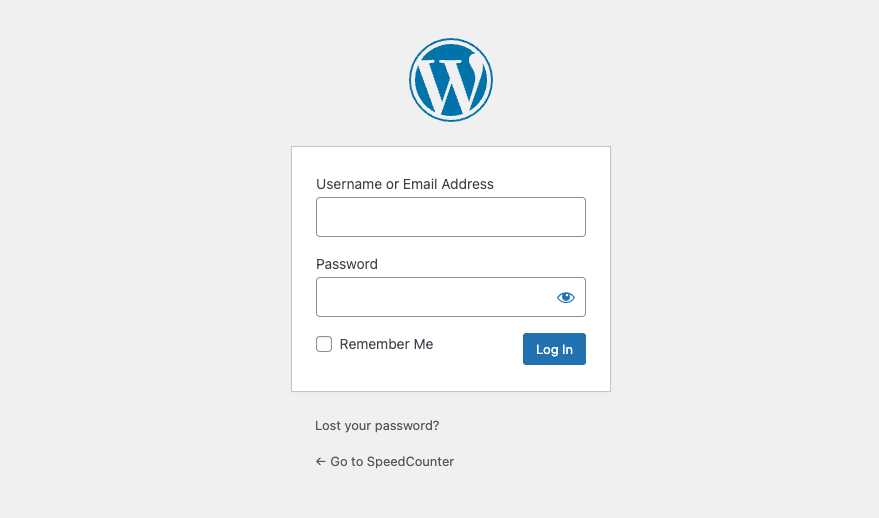
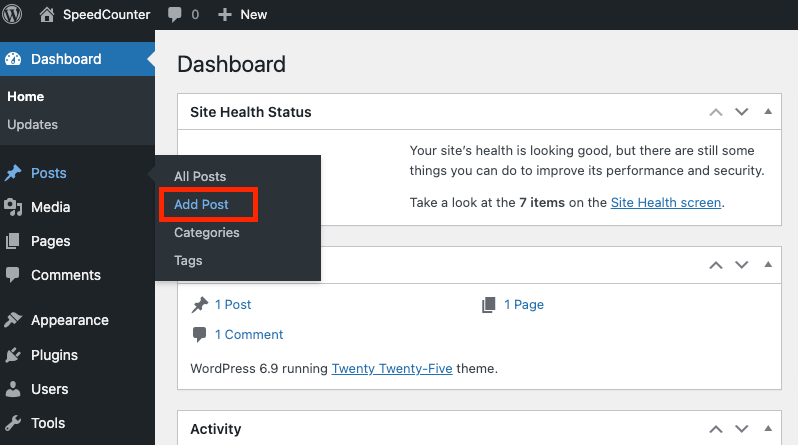
Step 1: Log in to the WordPress Admin Dashboard
After logging into your WordPress dashboard(https://yourdomain.com/wp-admin), locate “Posts” → “Add New” in the left-hand menu.
Clicking this will take you to the WordPress post editor—the primary space where you’ll create and edit content going forward.
Enter your username and password to access the dashboard.
Step 2: Go to Posts → Add New
From the left-hand menu, click:
Posts → Add New
This will open the WordPress block editor (also known as the Gutenberg editor).
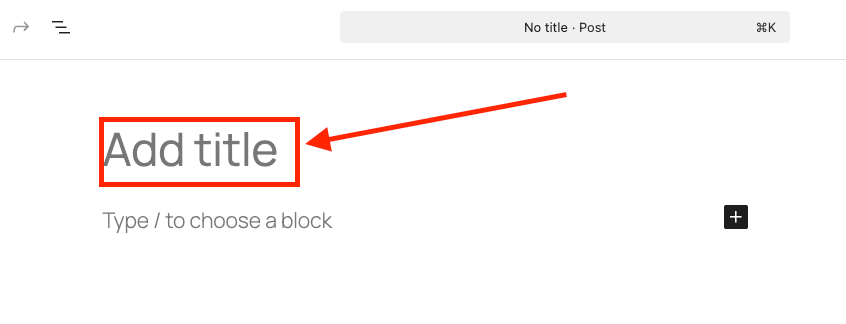
Step 3: Start Writing Your Post Title
The post title appears at the top of the editor.Start by crafting a clear, concise sentence that summarizes your post’s core message. Don’t stress over a “perfect title” right away—you can always refine it later. At the top of the editor, click “Add title” and enter your blog post title.
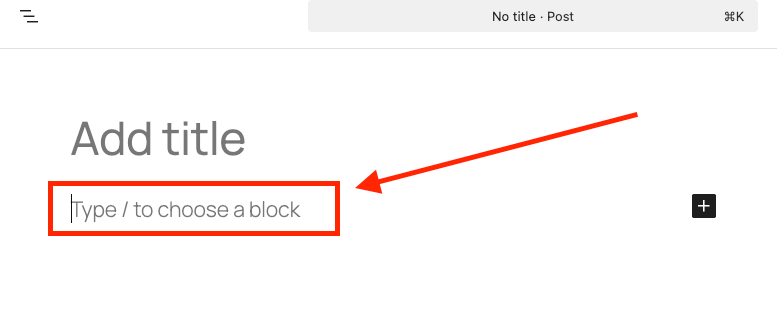
Step 4: Write Your Blog Content
Click the blank area below the title to begin typing your article content.
WordPress uses a block editor, so as you type, you’re actually creating a “paragraph block.”
For regular articles, just type as you would in any document—no extra settings needed.
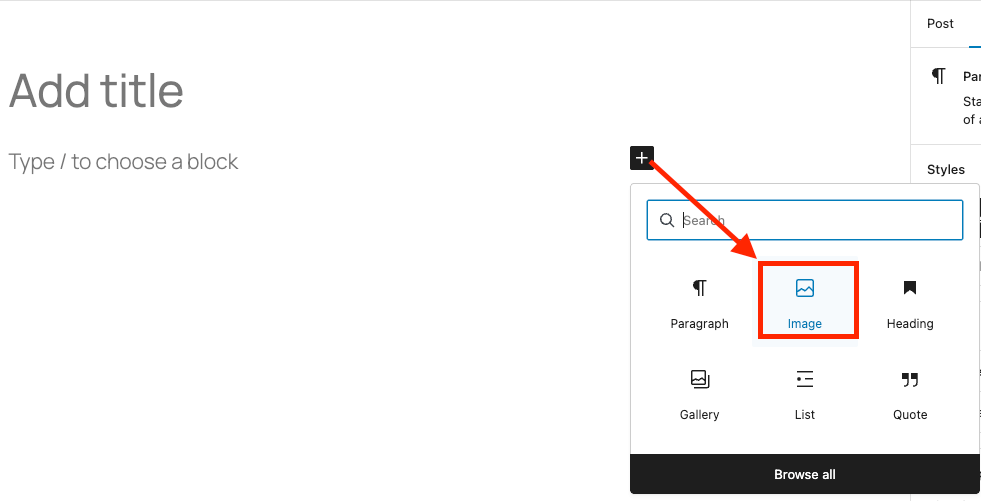
Step 5: Add Images to Your Blog Post
To add an image:
- Click the + button
- Choose Image
- Upload an image or select one from the Media Library
For SEO and accessibility, always:
- Add alt text
- Use descriptive file names when possible
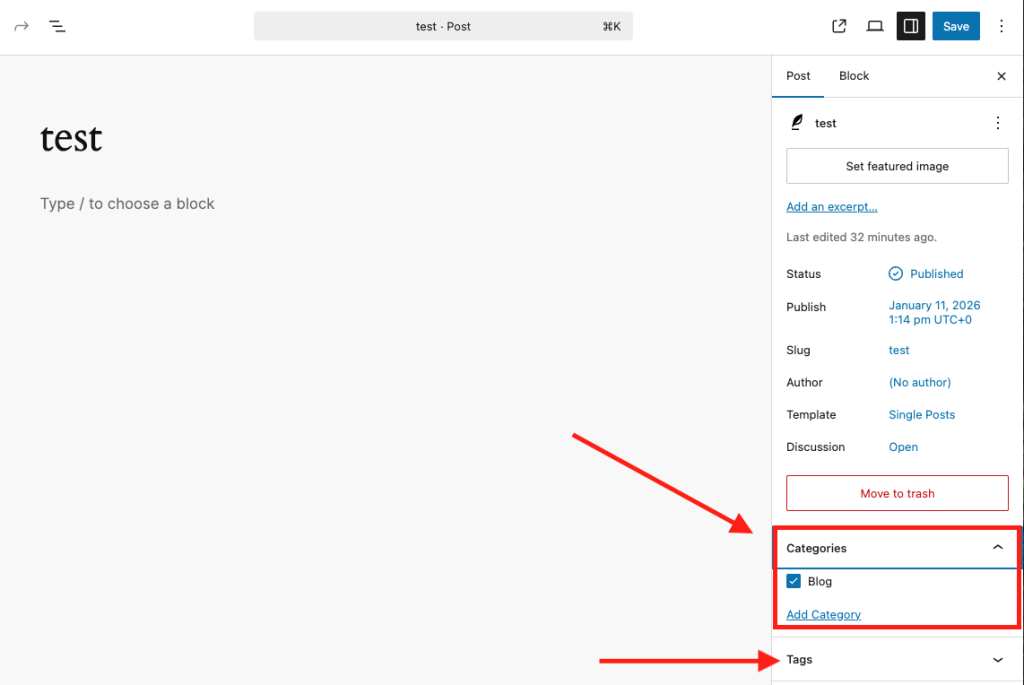
Step 6: Choose Categories and Tags
On the right side of the editor, you’ll see the post settings panel, including categories and tags.
• Categories determine which section your post belongs to
• Tags serve as supplementary keywords describing your content
If you haven’t finalized your category structure yet, don’t worry. Publishing with the default category is perfectly fine—you can adjust it later.
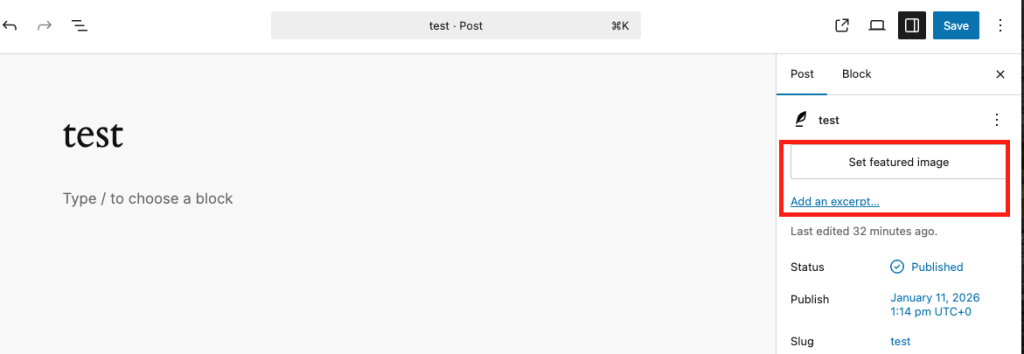
Step 7: Set a Featured Image
A featured image is often used:
- On blog listing pages
- In social sharing previews
- By some themes as the post header image
Click Set featured image, upload or select an image, and confirm.
Step 8: Preview Your Blog Post
Before publishing, click Preview to see how your blog post will look on the front end of your website.
This helps you:
- Check formatting
- Fix spacing issues
- Review mobile and desktop layouts
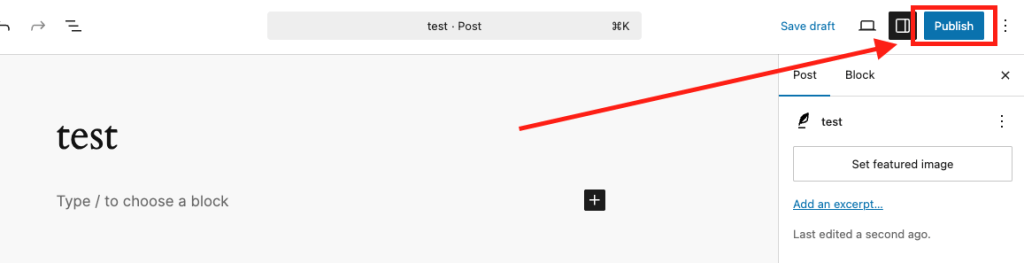
Step 9: Publish the Blog Post
Once you’re satisfied, click the “Publish” button in the top-right corner. Your first WordPress article is now live!
Editing or Updating an Existing Blog Post
To edit a published post:
- Go to Admin Posts → All Posts
- Click the post title
- Make changes
- Click Update