Installing a WordPress theme is a straightforward process, but the exact steps depend on how you plan to install it.
Some users want to install a theme directly from the WordPress Theme Directory.
Others already have a theme file they’ve purchased or downloaded.
And in some cases, manual installation via the server is necessary when uploads fail.
No matter which method you use, WordPress ultimately does the same thing:
it looks for a properly structured theme folder inside the /wp-content/themes/ directory and loads it.
Understanding this makes theme installation easier—and troubleshooting far less frustrating.
Before You Begin
Before installing a theme, keep the following in mind:
- You must be using self-hosted WordPress (WordPress.org) WordPress.com free plans do not allow third-party theme uploads.
- If you’re uploading a theme, it must be a valid WordPress theme ZIP file, not a full package containing documentation and demo files.
Method 1: Install a Theme from the WordPress Theme Directory
This is the easiest and most reliable way to install a theme if you don’t already have a theme file.
Admin Path
WordPress Admin
→ Appearance → Themes → Add New
Step 1: Find a Theme
On the “Add Themes” screen, you can:
- Search by theme name or keyword
- Browse Featured, Popular, or Latest themes
- Use the Feature Filter to narrow results
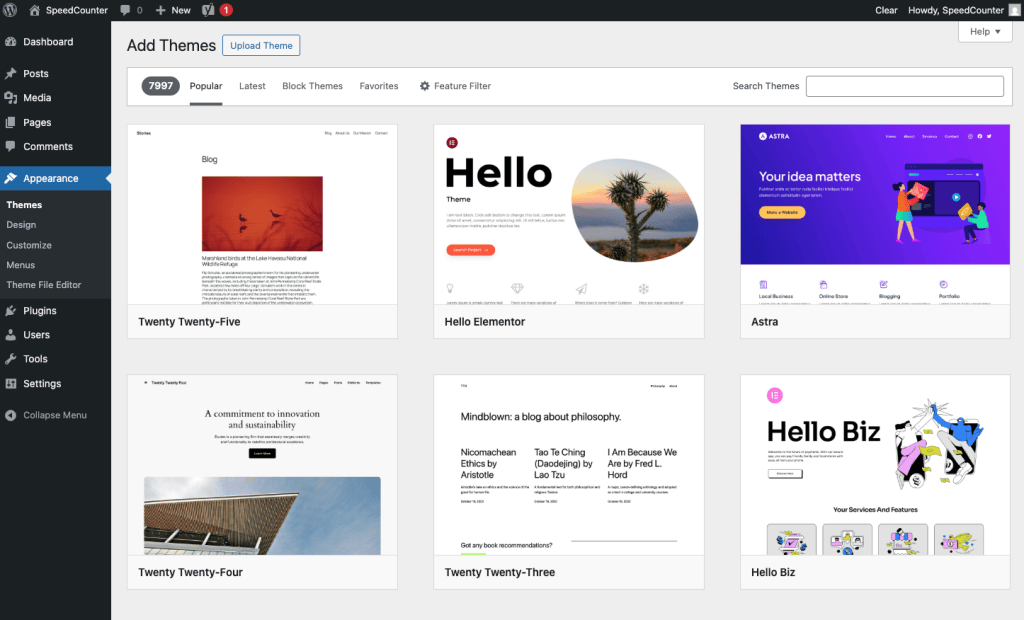
All themes in the official directory go through a basic review process and are generally safe to use.
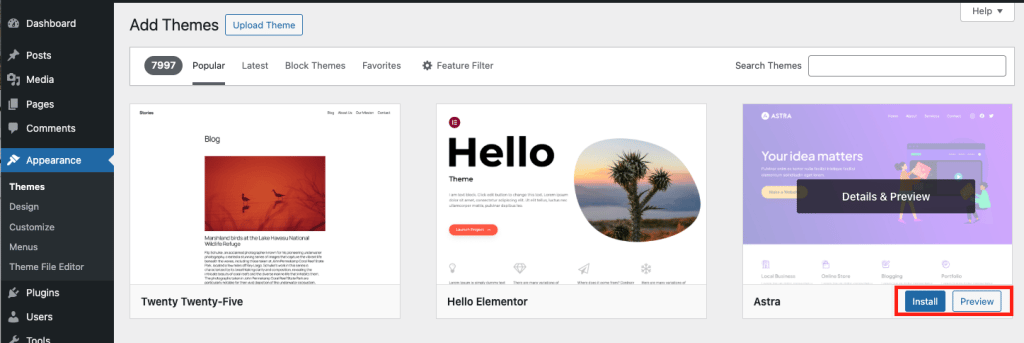
Step 2: Install the Theme
When you find a theme you like, hover over it to see the Preview and Install options. You can preview the theme first, and if it’s a good fit, click Install.
WordPress will automatically download and extract the theme into the correct directory.
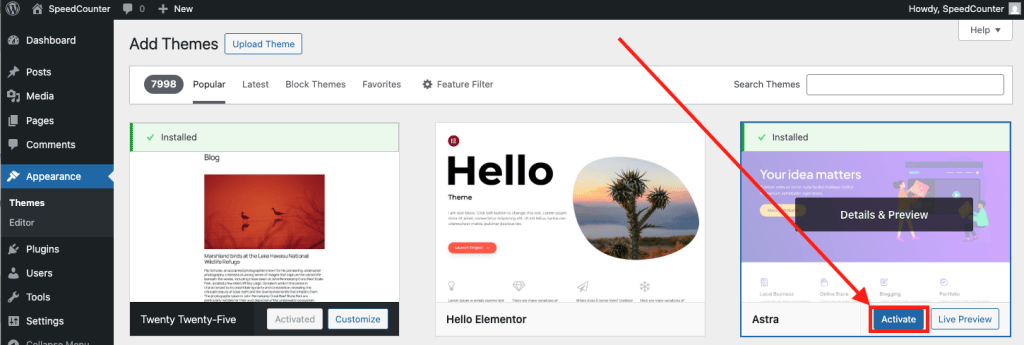
Step 3: Activate the Theme
Once installation is complete, click Activate.
The theme will immediately become active on your website.
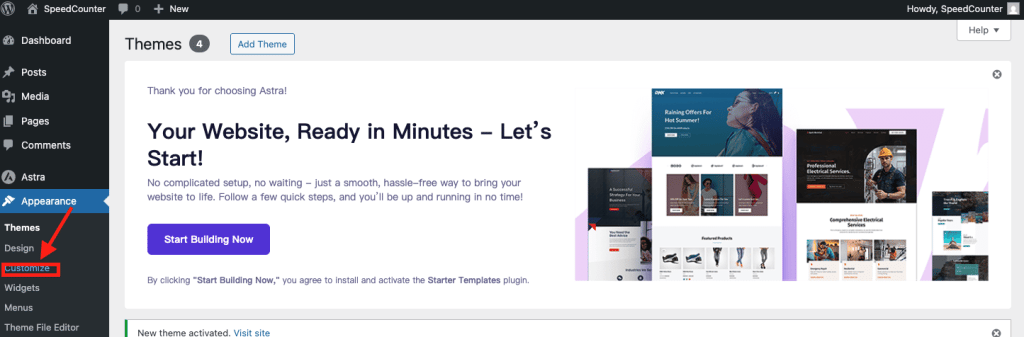
Step 4: Access Theme Customization (Optional)
Most themes support live customization.
Admin Path: Appearance → Customize
Here you can adjust branding, layout, colors, and other theme-specific settings.
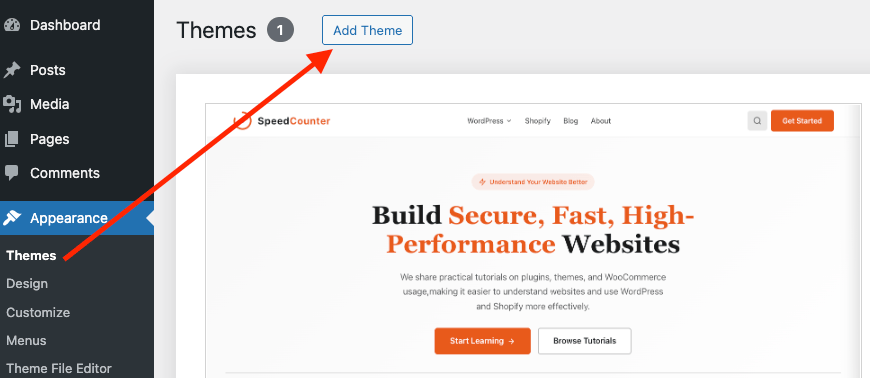
Method 2: Upload a Theme ZIP File
If you’ve purchased a premium theme or downloaded a theme from a third-party source, you’ll typically receive a ZIP file.
Admin Path
WordPress Admin → Appearance → Themes → Add Theme → Upload Theme

Step 1: Select the Theme ZIP File
Click Choose File and select the theme ZIP file from your computer.
Important:
Make sure you are uploading the theme ZIP itself, not a bundled package that contains multiple folders.
Step 2: Install and Activate
Click Install Now.
Once WordPress finishes installing the theme, click Activate to apply it.
Step 3: Initial Theme Setup (Optional)
Many commercial themes will prompt you to:
- Install required or recommended plugins
- Import demo content
- Access a theme options panel
These steps are part of theme setup, not theme installation, and can usually be skipped or completed later.
Method 3: Install a Theme via FTP or File Manager
If theme installation fails in the admin area due to file size limits, permissions, or server restrictions, manual installation is the most reliable fallback.
Step 1: Extract the Theme Files
Unzip the theme file on your local computer.
You should end up with a single theme folder.
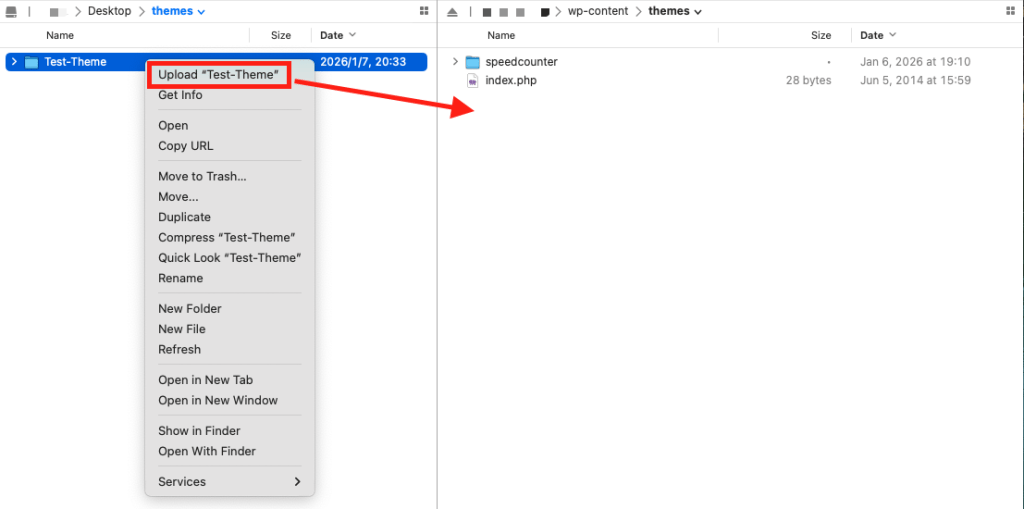
Step 2: Upload the Theme Folder to the Server
Using either:
- An FTP client (such as FileZilla), or
- Your hosting control panel’s file manager
Upload the theme folder to:
/wp-content/themes/
Step 3: Activate the Theme in WordPress
Once the upload is complete:
Admin Path: Appearance → Themes
The theme will appear in the list. Click Activate to enable it.
Why a Theme May Not Appear After Installation
If a theme does not show up in the WordPress admin area, the most common causes are:
- The theme folder is nested one level too deep
- The theme files are incomplete
- The uploaded folder is not a valid WordPress theme
WordPress only recognizes themes with a valid structure and theme header.
Final Notes
Installing a theme simply makes it available to WordPress.
Visual differences, demo layouts, and advanced styling usually require additional configuration after installation.
If the theme installs successfully but doesn’t look like the demo, that’s expected behavior and not an installation issue. Most themes require additional setup, so please check the theme’s documentation for detailed configuration and setup instructions.
